

Tapper goals: let Google bid on predicted conversion value
On this page
A Tapper goal creates a conversion action and a custom goal in your Google Ads account. The campaigns you attach it to bid on it. Tapper goals live on the Google Ads page of Setup > Ad accounts.
Before you start
- A Google Ads account is connected to the entity. See Connect Google Ads.
- You have the Owner or Admin role in the workspace.
- On a workspace with Block, the Tapper goals tab is always there. On a Lift only workspace it appears once Tapper enables Vantage: write to support@tapper.ai.
- The campaigns you attach a goal to should bid on Maximize Conversion Value.
Create a Tapper goal
- With several protected entities, pick the entity in the switcher under the workspace name. Under Setup, select Ad accounts, then open Google Ads.
- Open the Tapper goals tab. With several Google Ads accounts, the Ad account filter narrows the list to one.
- Click New Tapper goal. If the dialog shows an Account field, pick the Google Ads account.
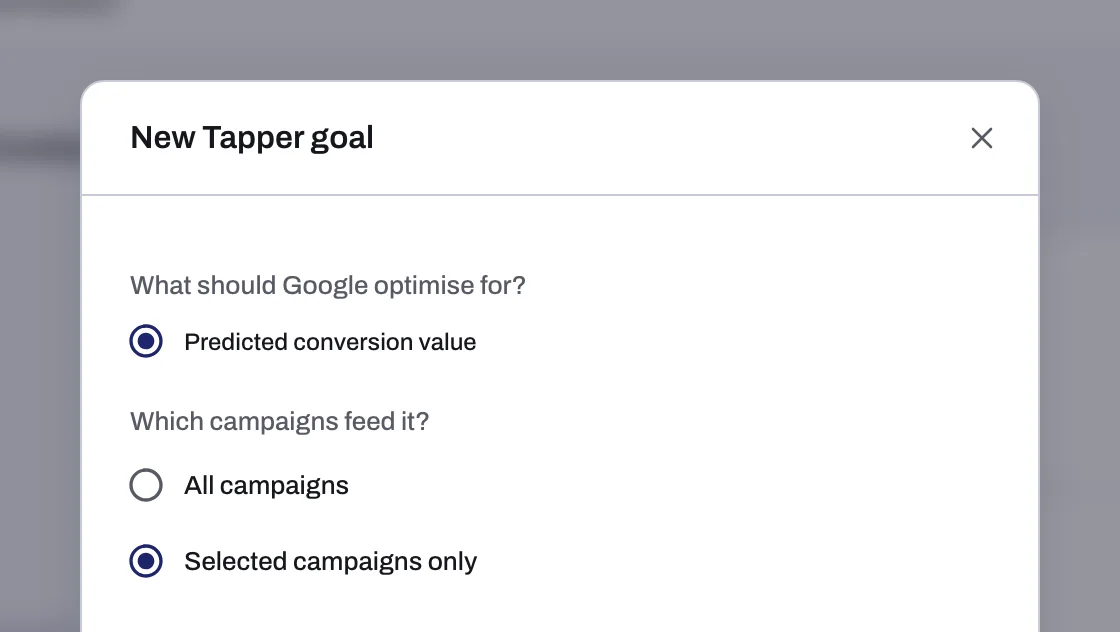
- Under "What should Google optimise for?", choose Predicted conversion value.
- Under "Which campaigns feed it?", choose All campaigns or Selected campaigns only and tick the campaigns.
- Click Create. The goal's card appears with the status Paused.
A new goal stays paused until Tapper's short setup review. Write to support@tapper.ai with the entity name and the goal's name. Once it is Active, you can attach it.
Read a goal card
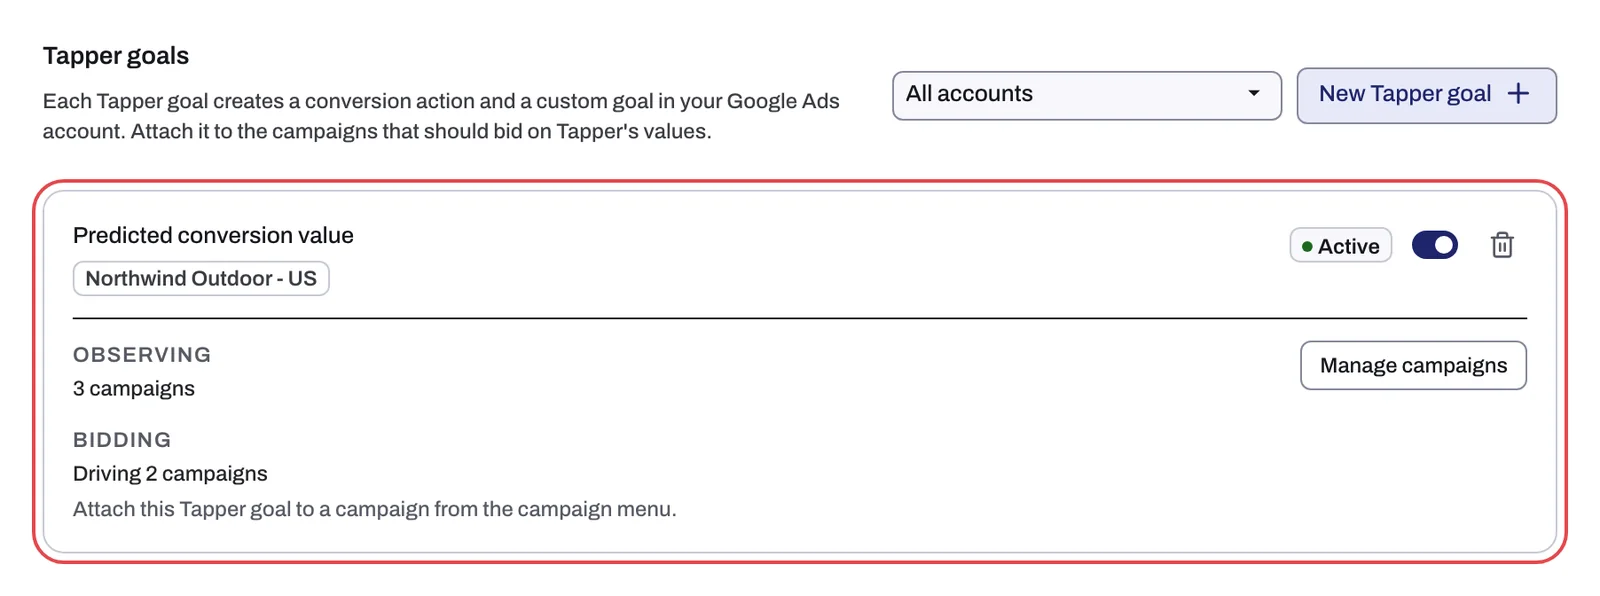
| Row | What it shows |
|---|---|
| Status | Active or Paused, with a switch whose tooltip reads Activate or Pause. |
| Observing | How many campaigns feed the goal, or All campaigns. Manage campaigns opens Campaigns feeding this Tapper goal, where you change them and click Save. |
| Bidding | Not driving bidding until the goal is attached to a campaign, then Driving and the number of attached campaigns, for example "Driving 2 campaigns" |
A campaign can feed a goal without bidding on it. Only attaching the goal changes the Bidding row.
Attach a goal to a campaign
- On the Campaigns tab of the Google Ads page, open the ⋮ menu on the campaign's row.
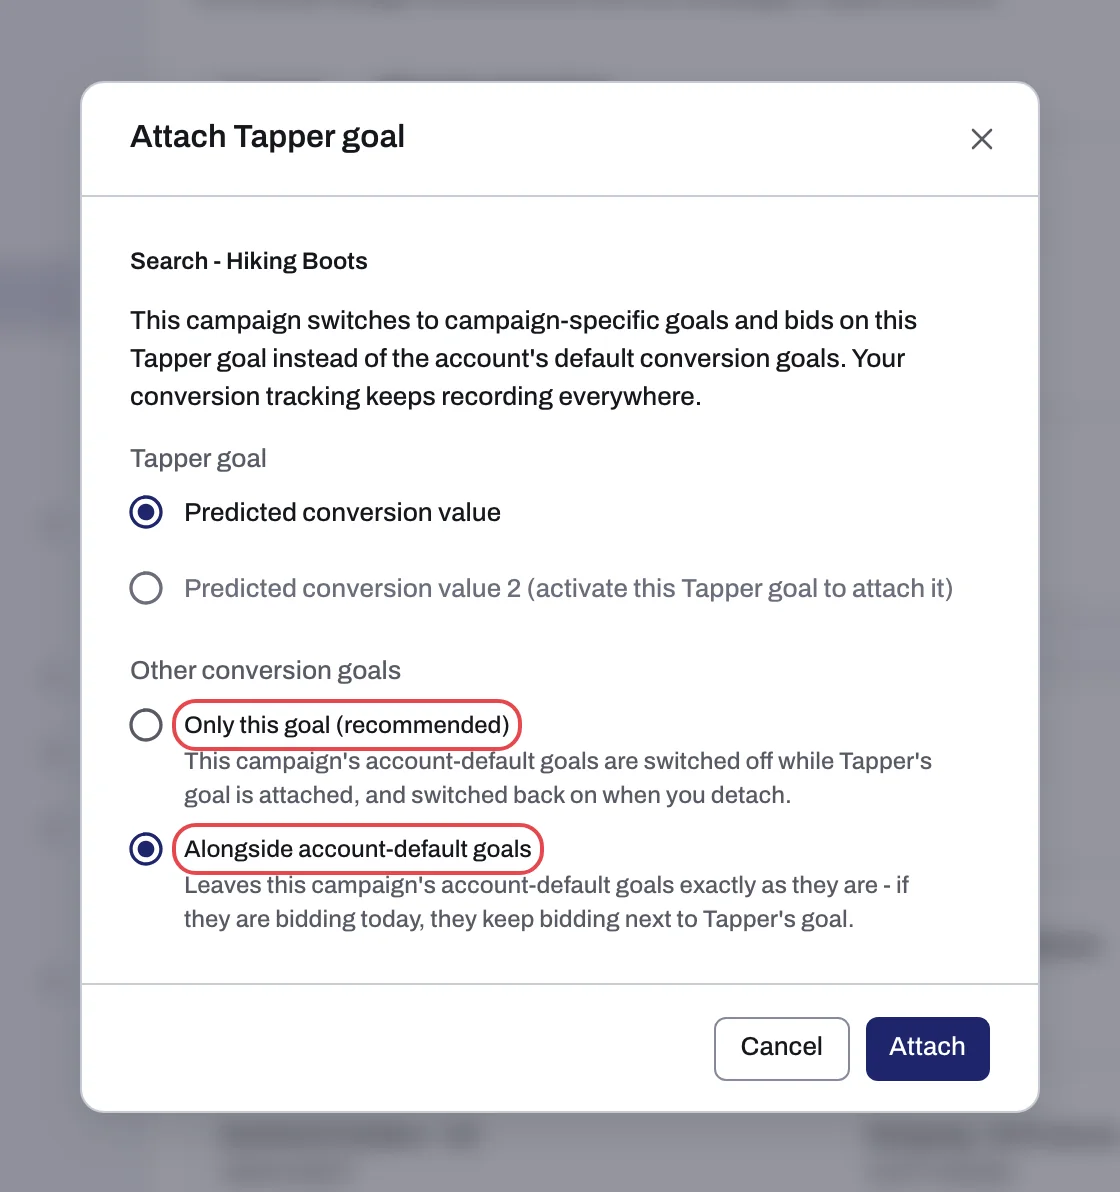
- Click Attach Tapper goal. With more than one Tapper goal, pick one under Tapper goal. Only an Active goal can be picked; a paused one is marked "activate this Tapper goal to attach it".
- Under Other conversion goals, choose one:
- Only this goal (recommended): the campaign bids on the Tapper goal alone.
- Alongside account-default goals (the default): the campaign also keeps bidding on your account-default conversion goals.
- Click Attach. The card's Bidding row now counts the campaign. On a workspace with Block, the campaign's Protection column shows the Tapper goal chip. With more than one Tapper goal, the chip names it, for example "Tapper goal: Predicted conversion value".
Change, detach or delete
- Edit Tapper goal attachment, in the row's ⋮ menu, changes the goal or the Other conversion goals choice.
- Detach Tapper goal, then Detach, stops the campaign bidding on the goal.
- The switch beside Active pauses a goal (tooltip Pause) and restarts one you paused (tooltip Activate). A paused goal stops uploading values and cannot be attached.
- The trash icon on the card, then Delete in the Delete Tapper goal? dialog, deletes a goal. It is detached from every campaign; the conversion action it created stays in your Google Ads account.
Attach Tapper goal grayed out, or the card still says Not driving bidding? See A Tapper goal says Not driving bidding.
Related
Was this helpful?
Still need help?
Chat with our team and mention this article.