

Install Tapper on a Shopify store
On this page
A Shopify store needs three parts. Shopify's checkout runs in a sandbox where theme scripts never run, so checkout events need their own pixel.
| Part | What it does | Where it goes |
|---|---|---|
| Monitoring script | Records how visitors behave on every storefront page. | Your theme (theme.liquid), or the Tapper Monitoring app embed once the Tapper app is installed. |
| Tapper Shopify app | Connects your order data. Shopify asks you to approve read-only access to orders, products and inventory. | Installed from a private link Tapper sends you. |
| Checkout pixel | Records your checkout's order value, currency and order id. | Shopify admin, Settings, Customer events. |
Conversions come from the checkout pixel, not a snippet on a thank-you page.
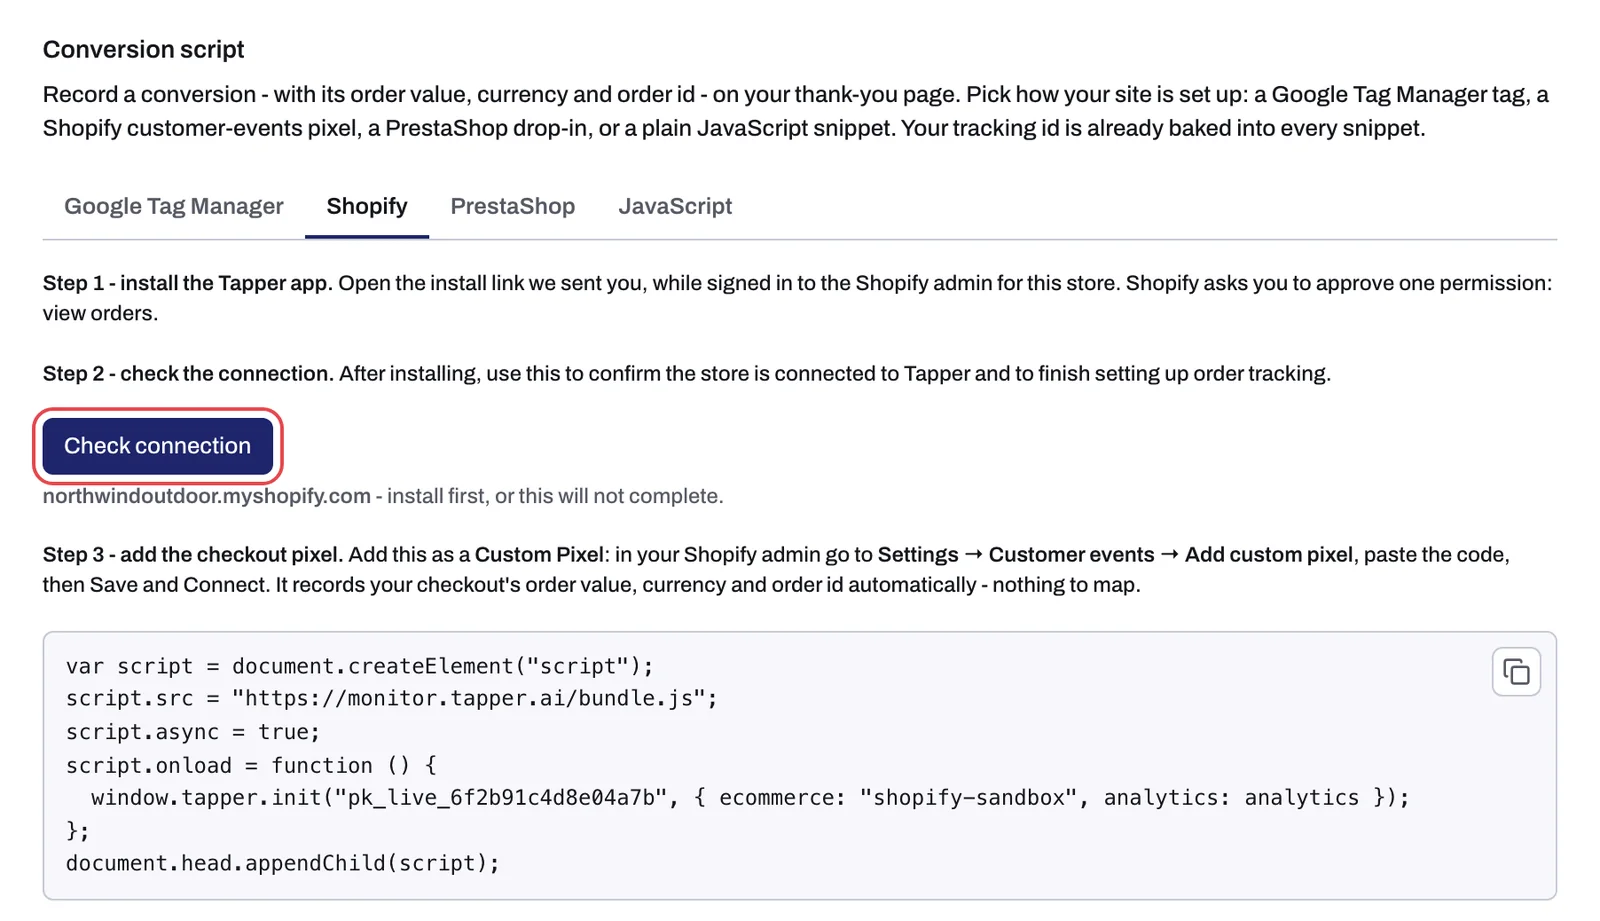
In Tapper, both scripts are in Setup > Website > Monitoring, on the Install script and consent tab: the monitoring script under Monitoring script, the pixel under Conversion script on its Shopify tab. The store's connection is its Shopify row in Setup > Data sources: see Connect your data: Setup > Data sources.
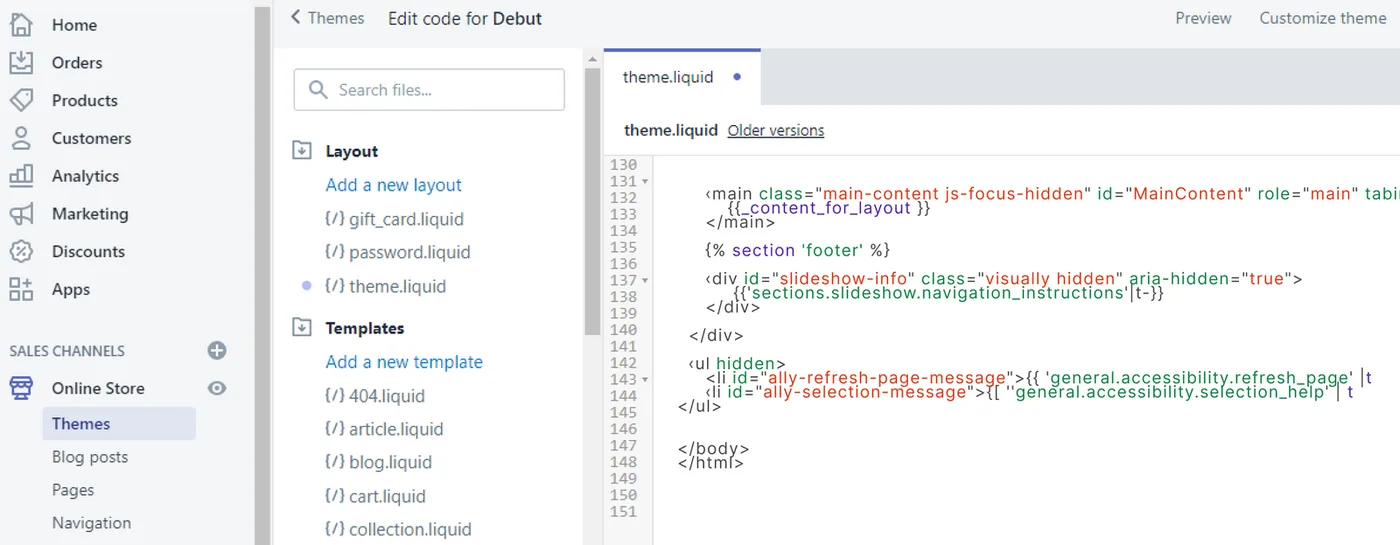
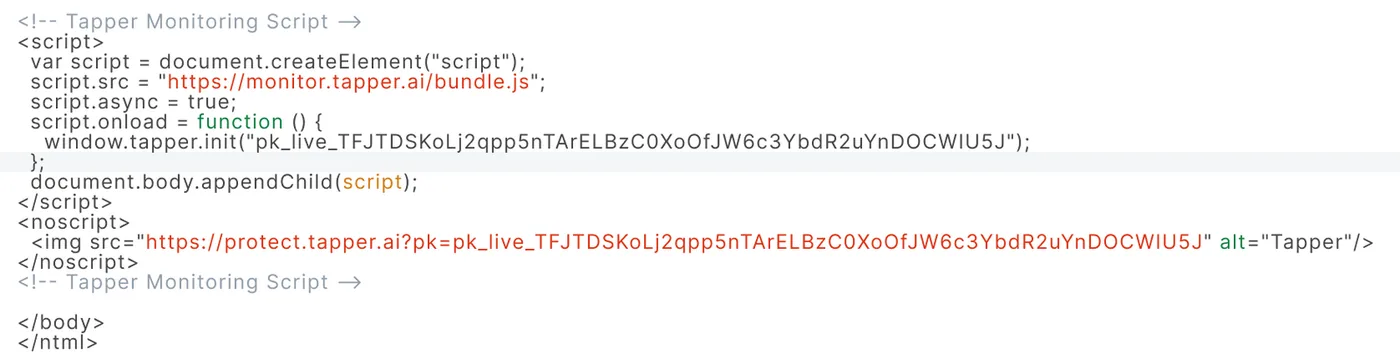
Step 1: put the monitoring script on your storefront
If it is already in your theme, leave it as it is. The checkout pixel adds to it.
To add it by hand:
- In Tapper, copy the monitoring script with the copy button at the top right of its code box.
- In Shopify, go to Online Store, then Themes. Click the three-dot button on your current theme and choose Edit code.
- Under Layout, open theme.liquid.
- Paste the script right after the opening
<body>tag (just before</body>works too). - Click Save.
Once the app is installed (step 2), you can use its app embed instead: Online Store, Themes, Customize, open App embeds, switch Tapper Monitoring on, enter your entity's key and save. The key is the value inside window.tapper.init("...") in your monitoring script. Use the theme paste or the app embed, never both, or tracking runs twice.
Step 2: install the Tapper app and check the connection
- In Tapper, open Setup > Data sources. Your store has a row under Sales. If Tapper holds an install link, press Connect while signed in to the store's Shopify admin; otherwise open the link Tapper sent you. Approve the read-only access Shopify asks for.
- Back in Tapper, click Check connection on the row. This finishes connecting your order data. The row reads Connected, with the time it was last checked.
The app is not in the Shopify App Store. Each link is for one store domain and expires after about a week. Several stores each need their own link and pixel; stores in one Shopify Plus organization can share one link.
If Data sources says "No Shopify store is registered for this website yet.", contact Tapper. There is nothing for you to enter.
Step 3: add the checkout pixel
- On the Shopify tab in Tapper, copy the pixel code. Your key is already in it.
- In Shopify, go to Settings, then Customer events, then Add custom pixel. Name it
Tapper. - Paste the code into the code window.
- Click Save, then Connect.
The code is plain JavaScript with no script tags. It looks like this, with your key where {your key} is:
var script = document.createElement("script");
script.src = "https://monitor.tapper.ai/bundle.js";
script.async = true;
script.onload = function () {
  window.tapper.init("{your key}", { ecommerce: "shopify-sandbox", analytics: analytics });
};
document.head.appendChild(script);
Do not rename or change analytics: Shopify's pixel sandbox provides it. The pixel records order value, currency and order id by itself, so there is nothing to map.
What happens next
- Settings, Customer events shows your
Tapperpixel as connected. - Order data arrives when a payment settles, not when checkout completes. Orders from before the install are not backfilled.
- To confirm the storefront script sends visits, see Check that the monitoring script is working on your site.
If something goes wrong
- The install link gives an error or a 404. Sign in to the store the link was made for. If the link is more than a few days old, ask Tapper for a fresh one.
- The link opens your Apps page and nothing installs. You were signed in to a different store. Sign in to the right one and open the link again.
- Shopify says you cannot install apps. Your staff account needs Shopify's Applications permission. Ask the store owner to open the link or grant it.
- Visits but no checkout or purchase events. The pixel is missing, or saved but never connected.
- Visits but no orders. Orders appear once payment settles, and only those placed after the install.
- Counts look roughly doubled. The script is both in your theme and on as the app embed. Remove one.
Remove Tapper from Shopify
Uninstall the app under Settings, Apps and sales channels, then delete the Tapper pixel under Settings, Customer events: uninstalling the app does not remove it. Uninstalling also turns off the Tapper Monitoring app embed, so storefront tracking stops. If you used the theme paste, remove the script from theme.liquid too.
Guides on docs.tapper.ai: Shopify Integration and Install the Tapper Shopify App.
Related
Was this helpful?
Still need help?
Chat with our team and mention this article.