

Catalogue frames: build a template with a sale badge or a brand ring
On this page
A frame draws a sale badge, a brand ring or a price around each product photo in your Meta catalogue ads. You describe the frame once, as a template, and Lift draws it on every product it applies to, in the three sizes Meta shows.
Lift reads your prices from your store, so a frame shows the same price as your website, and a sale badge comes on and off by itself as your sales start and end. This article shows how to build a template in Lift.
What you need
- Meta catalogue ads: ads that show products from your Meta catalogue.
- Catalogue access for Tapper: if your Meta ad account is listed on the Meta Ads accounts to reconnect card in Lift > Products, reconnect it there so Lift can read your catalogue.
- A connected Shopify store, for sale badges.
Find the templates
- Open Lift > Products, and select the Frames tab.
- Select New template.
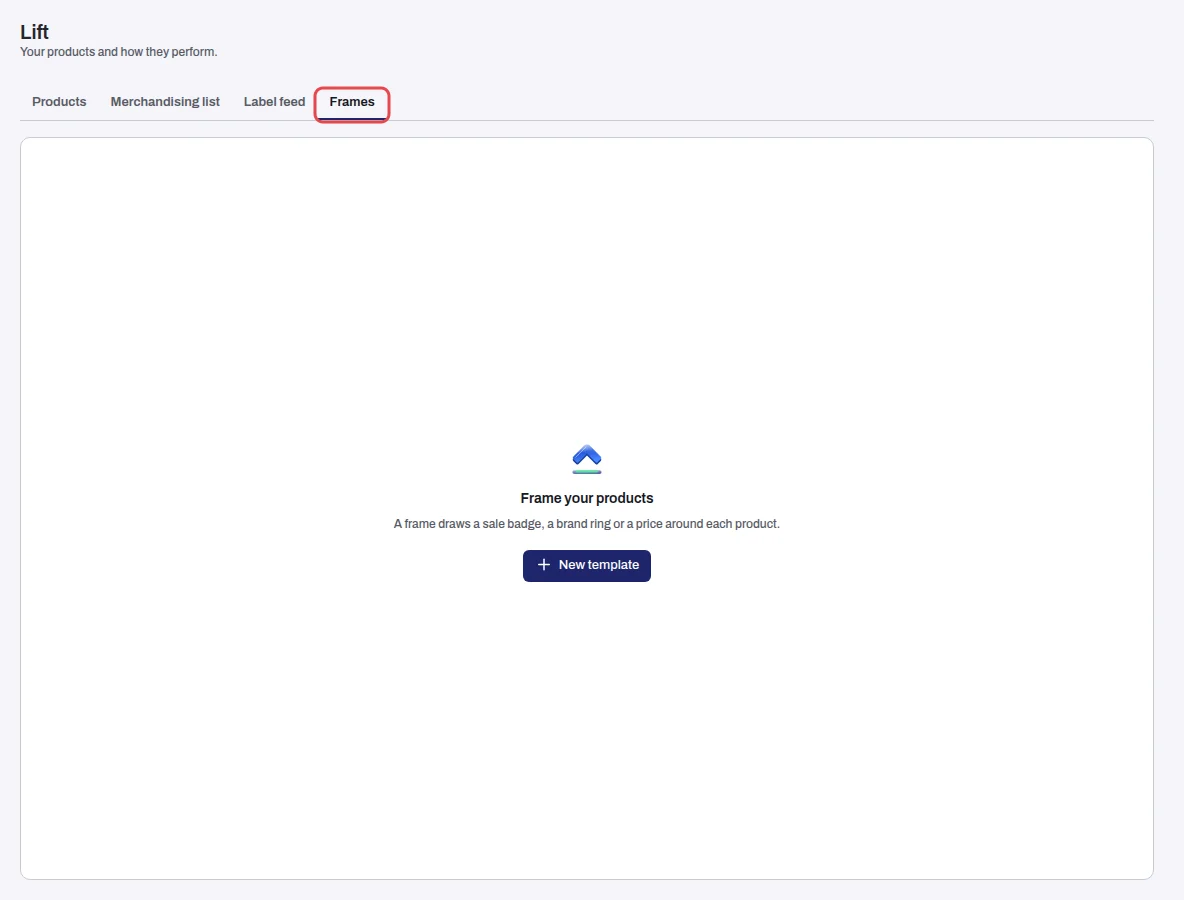
Once you have a template, this screen becomes a Frame templates table: its name, its sizes, how many layers it has and when it changed. Select a row to open the template. The bin on a row deletes the template, after you confirm.
Pick a starting point
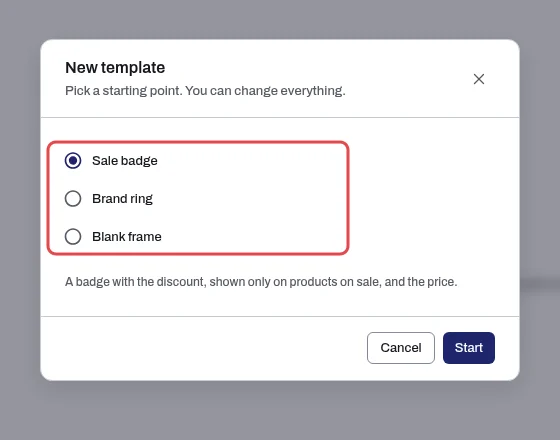
The New template window asks for a starting point. You can change everything afterwards.
- Sale badge: a badge with the discount, shown only on products on sale, and the price.
- Brand ring: a ring around the product with the brand name beneath.
- Blank frame: just the product picture. Add what you need.
Pick one and select Start.
The editor
The template opens in the editor, in all three sizes. One column holds the Template name, Sizes, Layers, the settings of the selected layer and Checks. Beside it, the Layout guide shows what the selected size looks like.
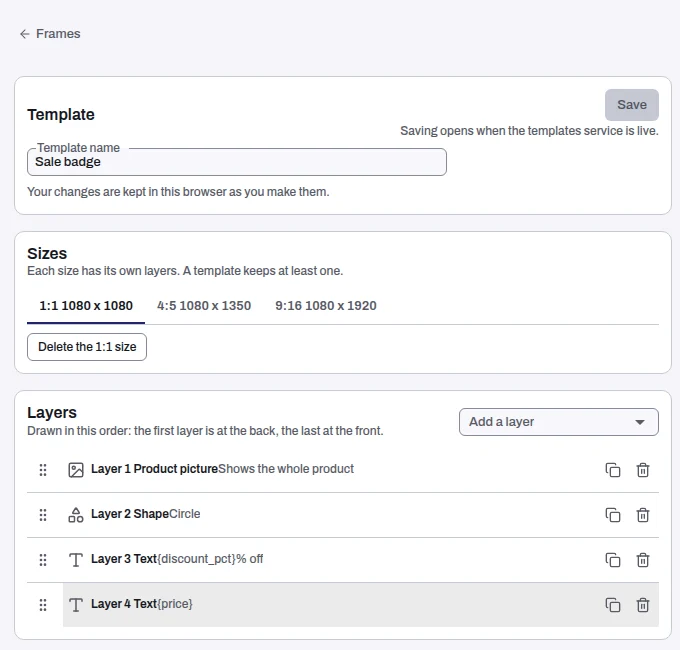
Your changes are kept in this browser as you make them.
Sizes
Each size has its own layers, and a template keeps at least one size:
- 1:1 (1080 x 1080), the square feed image;
- 4:5 (1080 x 1350), the tall feed image;
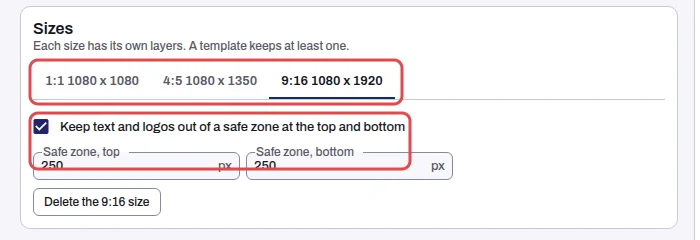
- 9:16 (1080 x 1920), full screen in Stories and Reels.
Select a size to work on it. Add a size adds one the template does not have yet, and the delete button, named for the size you are on, such as Delete the 4:5 size, removes it.
On 9:16 you can tick Keep text and logos out of a safe zone at the top and bottom and set Safe zone, top and Safe zone, bottom. The Layout guide shades the zone, so you can keep your text clear of it.
Layers
A layer is one piece of the picture. Layers lists them in the order they are drawn: the first layer is at the back, the last at the front. Drag a row by its handle to change the order. Each row has a button to duplicate the layer and one to delete it.
Choose Add a layer to add one of five kinds:
- Product picture: your product photo. Fit is Show the whole product or Fill the box, and Background colour is optional.
- Text: words and product details (see below).
- Shape: a Rectangle, Rounded rectangle, Circle or Ring, with Fill colour, Outline colour, Outline width and Corner radius.
- Frame image: a full-size picture, such as a border.
- Logo: your logo.
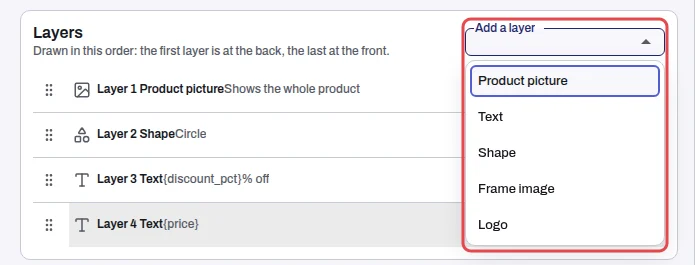
Select a layer to open its settings. Every layer has Place and size (Left, Top, Width and Height in pixels, and Opacity) and When to show it. A template can hold up to 40 layers on each size.
A text layer with product details
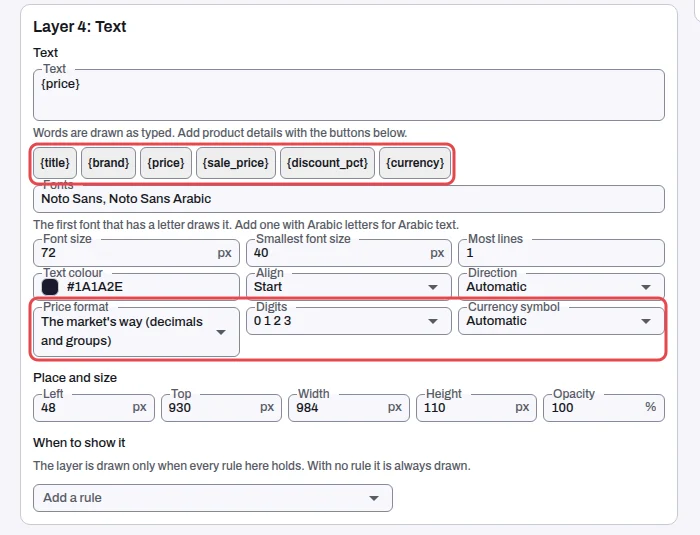
In a text layer, type your words in Text. Select a product detail button to put that detail in the text where your cursor is: {title}, {brand}, {price}, {sale_price}, {discount_pct} and {currency}. For example, {discount_pct}% off draws 25% off on a product with a 25% discount.
- Fonts: the first font in the list that has a letter draws it. Add one with Arabic letters for Arabic text.
- Font size, Smallest font size and Most lines: how big the text is, how small it may get, and how many lines it may use.
- Text colour, Align (Start, Centre or End) and Direction (Automatic, Right to left or Left to right).
- Price format: The market's way (decimals and groups) or The number as it is.
- Digits: 0 1 2 3, or the Arabic-Indic digits.
- Currency symbol: Automatic, Currency code (KWD) or Arabic symbol.
Choose when a layer shows
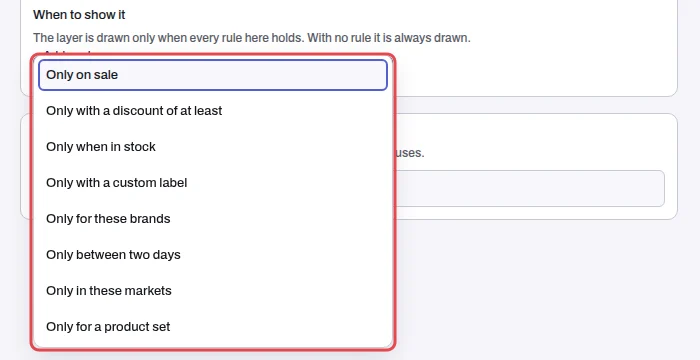
Under When to show it, Add a rule picks when the layer is drawn. The layer is drawn only when every rule holds. With no rule, it is always drawn. A layer holds up to 10 rules.
- Only on sale
- Only with a discount of at least: a percentage you set.
- Only when in stock
- Only with a custom label: one of your five custom labels and the value it must hold.
- Only for these brands
- Only between two days: a From and an Until day, read in the time zone you set.
- Only in these markets: country codes, and optionally languages.
- Only for a product set
The Sale badge starting point uses Only on sale on its badge and its discount text, so a product at full price shows no badge.
Check the layout
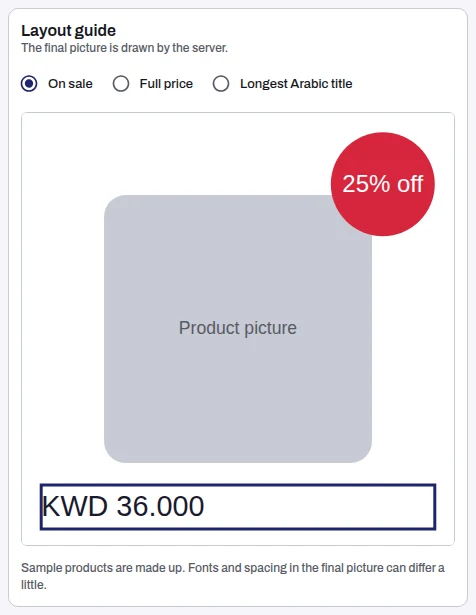
The Layout guide redraws as you type. Choose a sample product to see your template on it:
- On sale: a product with a sale price and a discount.
- Full price: a product with no sale.
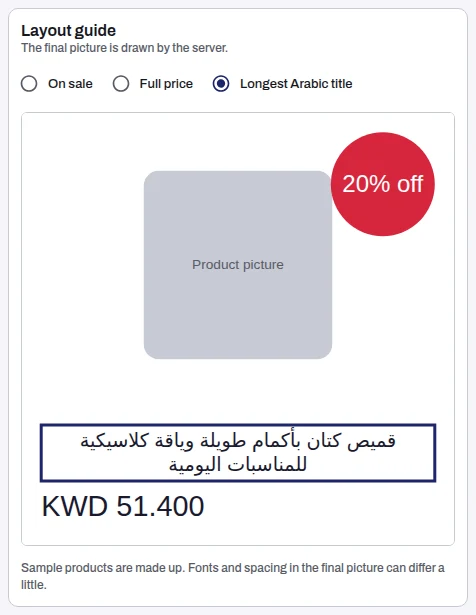
- Longest Arabic title: the hardest case for text, with a long title in Arabic.
The sample products are made up and priced in Kuwaiti dinars, and fonts and spacing in the final picture can differ a little. The final picture is drawn by the server.
Here the Sale badge template's price layer reads {currency} {sale_price}, with Currency symbol set to Currency code (KWD), so the On sale sample shows its sale price with its currency.
For an Arabic title, give the title its own band under the photo, so the words never sit on the product. In this example the Product picture layer is 760 pixels high, and a text layer with {title} sits beneath it at Top 780, with Most lines 2. On the Longest Arabic title sample, the title wraps onto two lines inside its band.
Checks tests the template as you type, with the same rules the server uses. It says All checks passed, or lists what needs fixing with its size and layer. Select an item to jump to it.
From template to your ads
These steps happen after you build the template:
- Approval. An Owner, Admin or Manager of your workspace approves a template before it goes on any ad, and the approval is recorded under their name. Nothing in your catalogue or your ads changes until then.
- Your catalogue. Lift adds the framed images next to your original photos, which stay untouched, and switches the ads you choose to show them. You can put an ad back the way it was.
- Prices stay right. Every price on a frame must match your catalogue and your store. If it does not, Lift does not use that image, and the ad shows the product's next frame or its original photo.
- A sale badge follows your store. It comes on when a product goes on sale and comes off when the sale ends.
- Every frame comes off in one go. Remove frames points each ad back at what it showed before and takes away every framed image Lift added, leaving your catalogue as it was.
Limits
- Advantage+ sales campaigns. Lift switches ads in Advantage+ sales campaigns. Meta no longer lets any tool edit the older Advantage+ shopping campaigns, so their ads keep their current images.
- Discounts at checkout. When a product has an extra discount at checkout, from an automatic discount or a discount code, its frame shows no price, so your ad never shows a price your shopper will not pay.
- Small photos. Product photos under 500 by 500 pixels are left without a frame, as Meta needs at least that size.
Related
Was this helpful?
Still need help?
Chat with our team and mention this article.