

Frames: put sale badges, labels and prices on your Meta catalog ads
On this page
A frame is a layer drawn on each product photo in your Meta catalog ads: a sale badge, a label such as Best seller, a ribbon for White Friday, the price. You make it once as a template, your team approves it, and Lift draws it on every product it applies to and keeps it right as prices, sales and stock change. Where your workspace has Lift, brands work on Lift > Products > Frames in the Tapper app. Agencies start in their own app: see Agencies.
What frames do
Your original photos are never touched: the framed picture sits beside them on each catalog item, and every step that puts frames on has one that takes them off.
To add frames to your workspace, . That alone changes nothing on Meta: your catalog and ads stay as they are until a member of your team approves a template and puts it on a catalog. You need:
- Meta catalog ads that show products from a Meta catalog Tapper can read. If the Frames tab says Reconnect Meta to use frames, select Reconnect beside your ad account and tick your catalog.
- A connected Shopify store (optional), so sold-out follows your store's stock. Prices and sale prices on a frame always come from your Meta catalog, the price Meta shows beside the picture in your ad, so the frame and the ad agree; a connected store decides sold-out and gives the stock count. Without a store, frames follow your Meta catalog's in stock or out of stock, and a stock count such as Only a few left needs the store.
- An Owner, Admin or Manager role to approve a template.
The Frames tab
The top of the tab counts your frames live, the products framed and any problems, and How frames work walks the three steps: 1 Make a template, 2 Put it on a catalog, 3 Use it in ads. The views on the left follow the same order: Templates, On catalogs, In ads, Checks and Results. Beside Frames, the Head to head tab tests framed ads against your current ads: see Compare your ads head to head.
Make a template
- Open Lift > Products, select the Frames tab and stay on Templates.
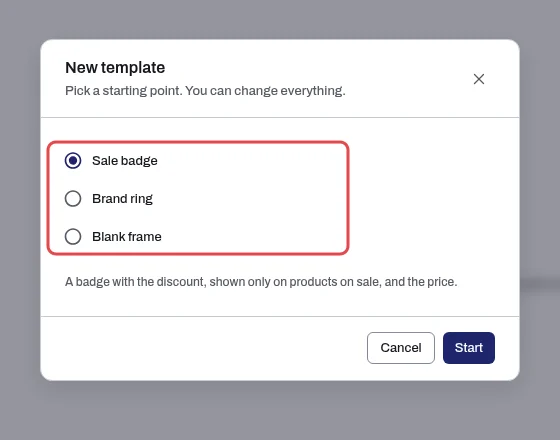
- Select New template, name it and pick a starting point. For the Gulf starting points, also choose English or Arabic under Language of the words.
- Select Start. The template opens in the editor.
Templates lists each template with its status (Draft, Approved, Live on a number of catalogs, or Retired). Select one to open its page, with its versions and its Rename and Retire buttons.
Starting points
You can change everything after you start. Every Gulf starting point comes in English and Arabic. A price on a frame is what the shopper pays.
| Group | Starting point | What it draws |
|---|---|---|
| Basics | Sale badge, Brand ring, Blank frame | A sale badge (with the old price struck through beside the price on products on sale), a ring with the brand name, or just the product picture. |
| Prices | Price tag | The price in a tag at the bottom. |
| Prices | Was and now, Percent off, Save amount | The old price struck through, the discount, or the amount saved. Products on sale only. |
| Labels | Best seller, New arrival | A label on products in your Best Seller or New Arrival group (it reads New in), and the price. |
| Labels | Only a few left | "Only 3 left" on products with 5 or fewer in stock, and the price. Needs a connected store for the count. |
| Labels | Split payments, Free delivery | The number of payments and each amount, or free delivery from an amount you set. No file: see Split payments and free delivery labels. |
| Sale moments | 11.11 (11 Nov), White Friday (last Friday of Nov to the Monday after), UAE National Day (2 to 3 Dec), Saudi National Day (23 Sep), Ramadan, Eid (Eid al-Fitr), Back to school (15 Aug to 15 Sep), Year end (26 to 31 Dec) | A ribbon with the moment's name, the discount and the price. The discount shows only on products on sale. |
The days of a sale moment are a suggestion: you set the real dates when you put the frame on a catalog. For Ramadan and Eid, check the days once the moon is sighted. If your groups have other names than Best Seller and New Arrival, change the name in the layer's Only for a product set rule.
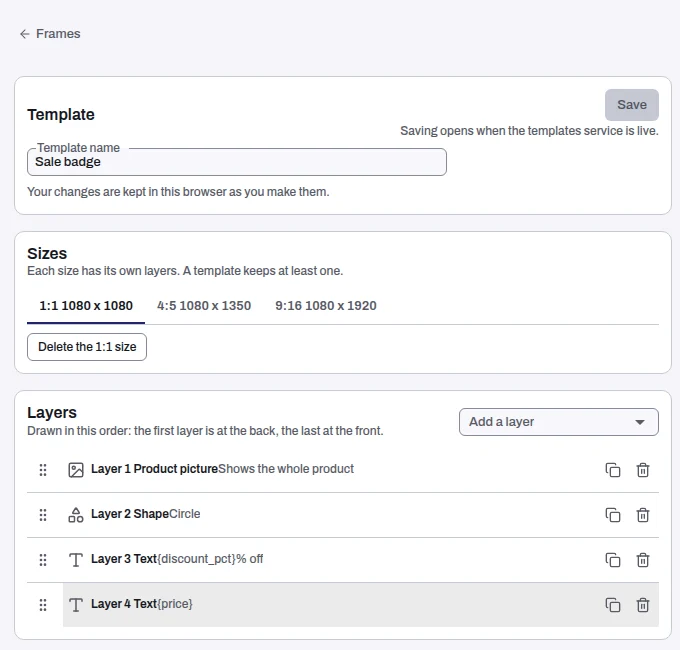
The Best seller label on a handbag in the Best Seller group:
The editor
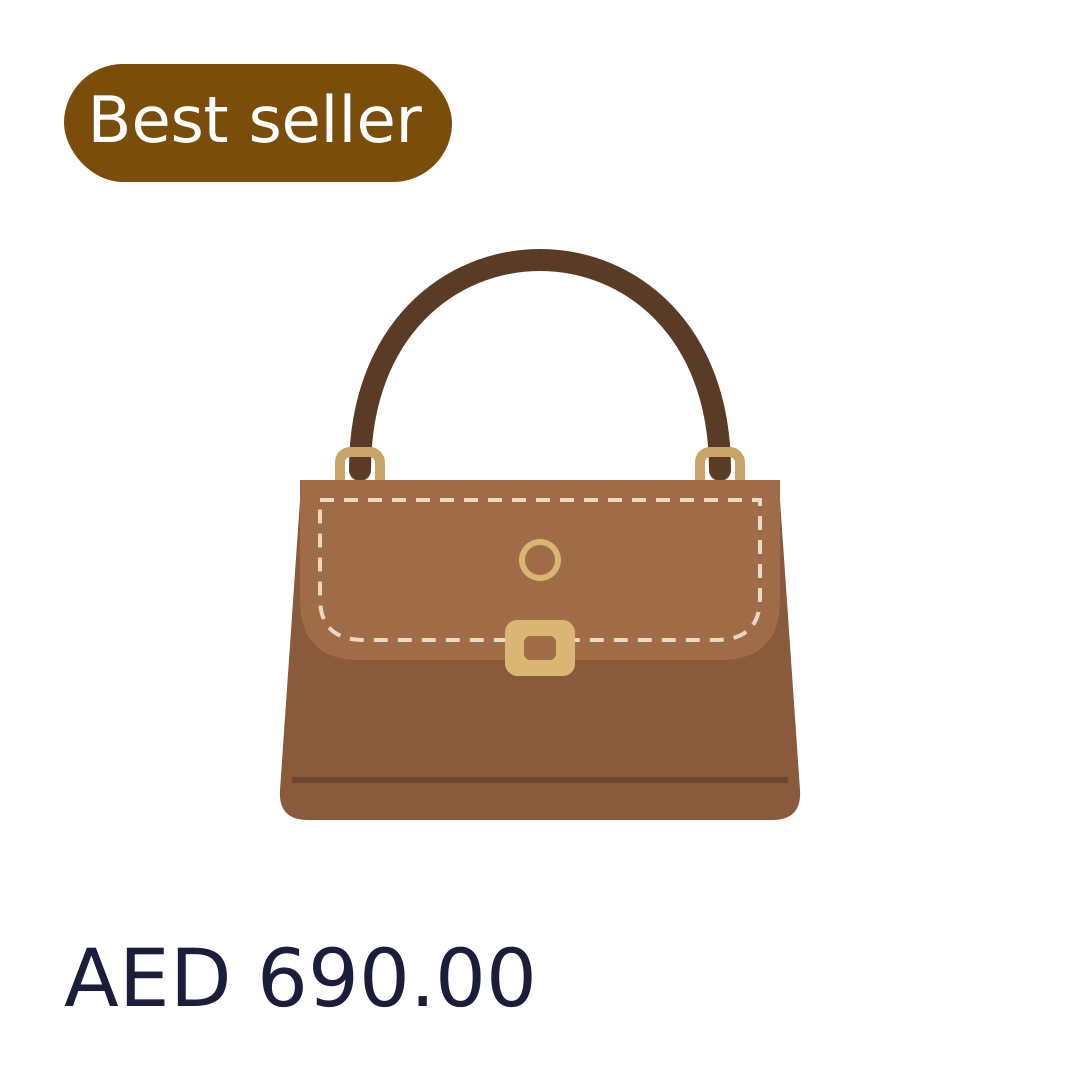
Your template is drawn on a made-up product beside its settings. Click a layer to select it, drag it to move it, drag a corner to resize it, or nudge it with the arrow keys. Saving makes a new version; the version you opened stays as it was.
- Size: a Meta template is the square 1:1 (1080 x 1080) that goes on your catalog.
- Layers: Product picture, Text, Badge, Shape, Frame image and Logo, drawn first at the back, last at the front. Drag a row by its handle to reorder it. Up to 40 layers.
- Colors: every color field shows your brand colors as swatches under Brand colors. Press one to use it, open the picker, or type a code such as #1E256B. Add a color to the swatches once and it is there for every template.
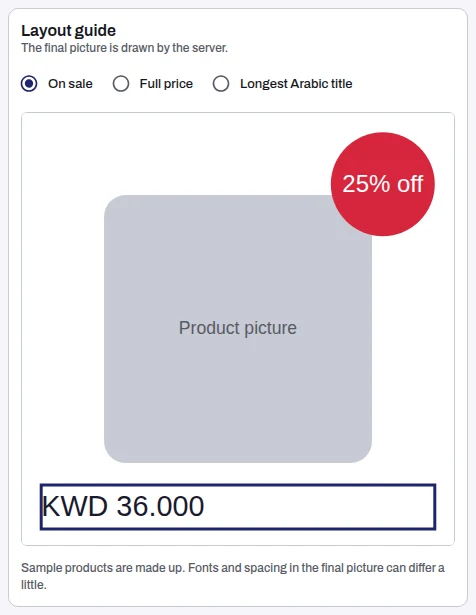
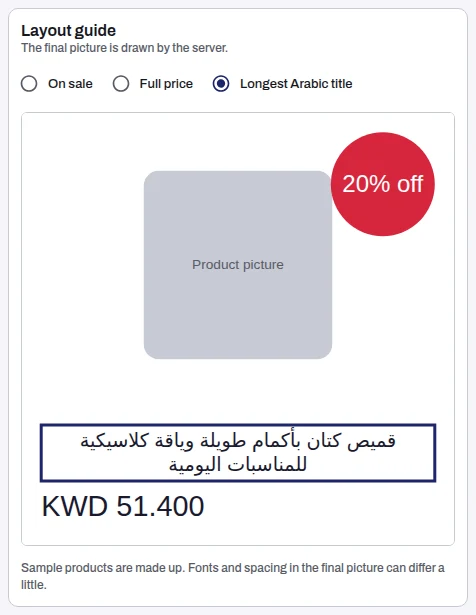
- Layout guide: see the template On sale or at Full price, or on one of your own products with Search products.
- Checks: tests the template as you type and names the layer to fix.
- Pictures and fonts: your logos and frame images (PNG, up to 5 MB) and brand fonts (TTF or OTF, up to 2 MB; pick one with Arabic letters for Arabic text). Pictures are scaled to fit; an enlarged one may look soft.
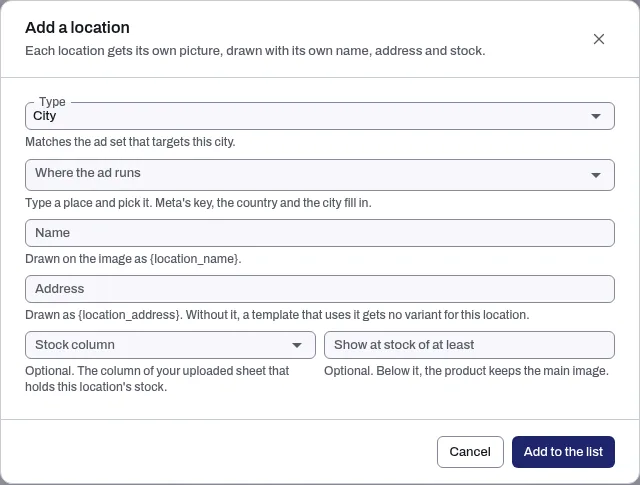
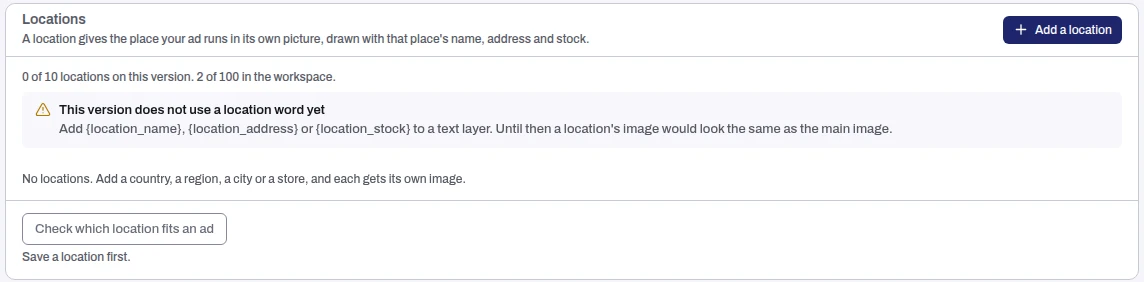
- Locations: one picture for each country, region, city or store, drawn with
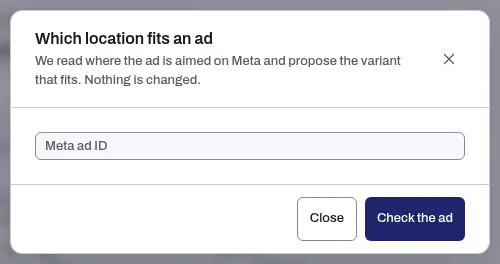
{location_name},{location_address}or{location_stock}. Up to 10 a version and 100 a workspace. Check which location fits an ad reads where a Meta ad is aimed and proposes the variant that fits.
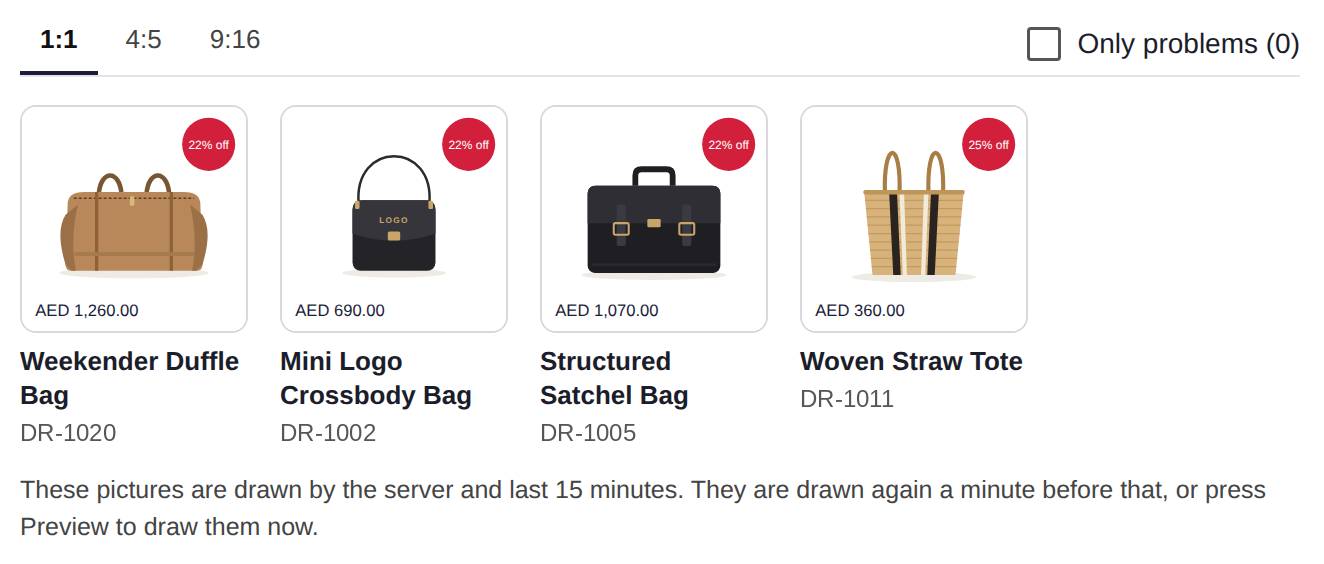
Preview on products draws the template on products from your own catalog, by product or by scenario (On sale, Full price, Longest price, Market). Nothing is sent to your catalog or ads. The pictures come back in a grid.
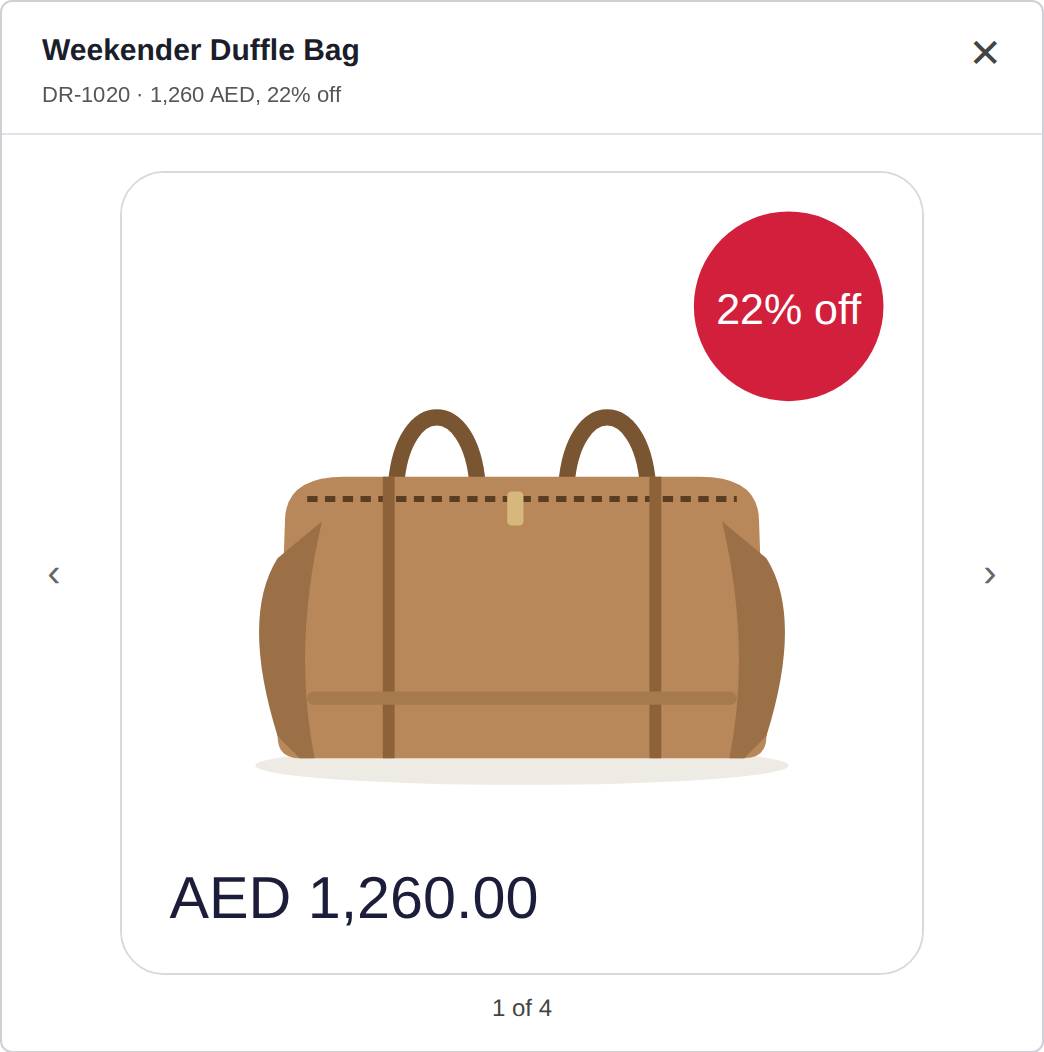
Select a picture to see it large, with the product's id, price and discount:
Move a ribbon or badge, and make room for it
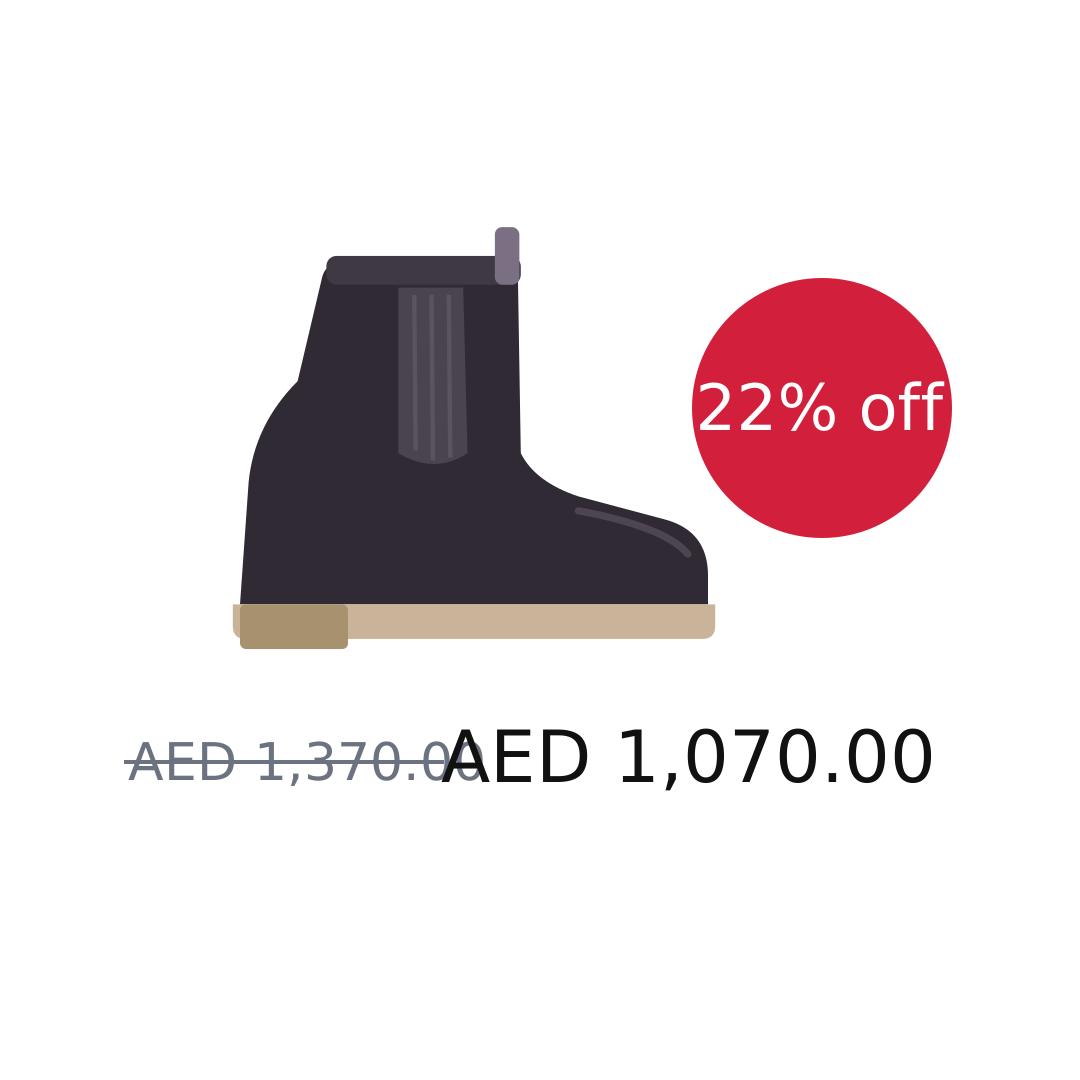
- Move it: drag the layer, such as the White Friday ribbon, or pick a spot under Place and size (exact Left and Top are under Advanced). Badges and prices should stay inside the middle band (258 to 822 pixels from the top): the editor shades the outside of the band and warns you, and never moves a layer by itself. Move into the band moves the layer back inside.
- Make room: select Product picture, keep Fit on Show the whole product, lower Product size (such as 70%) and drag it down, leaving a strip above.
- Check it: try On sale and Full price, save, then Preview on products.
Price, sale, stock and labels
A detail in curly brackets is filled in for each product. The buttons under the Text box add the common ones.
| Write | What each product shows |
|---|---|
{now_price} | What the shopper pays: the sale price while on sale, otherwise the price. Use it on a sale frame. |
{price} | The price. On a product on sale, the price before the sale. |
{sale_price}, {discount_pct}, {saving} | The sale price, the discount as a number, and the amount saved. |
{currency}, {stock}, {title}, {brand} | The currency, the stock, the title and the brand. |
Money details are the amount alone, so write {currency} {now_price} for AED 1,250.00. Set Price format, Digits, Currency symbol and Direction on the layer to match your market.
Under When to show it, Add a rule decides when a layer is drawn: Only on sale, a discount, stock, price, brand, market, days, a product set or a value in a field. The layer shows only when every rule holds. A price rule compares an amount in each currency you list, and a product in a currency you did not list does not match. Add Only on sale to anything that reads {sale_price} or {discount_pct}, and Stock at most 5 to an Only {stock} left layer.
Product fields, on the Templates view of the Frames tab, brings your own details into a frame, such as a badge word or a gift note:
- Select Add fields and name the set. Download a sample file shows the layout.
- Upload a CSV, or Use an address for a file Lift reads again every day, such as a Google Sheet shared with anyone who has the link. Up to 750 KB and 10,000 rows.
- The first column is the product id. A column headed
Badge textbecomes{f_badge_text}. - Select Save fields. Lift tells you how many rows matched your products.
To change a few products later, select Replace file on the set and pick Update by product id: the window says what will change before you save. An empty cell keeps the old value, so to clear one, use Replace the file instead. Lift refuses personal details such as e-mail or phone.
Approve it
A version goes on a catalog only once an Owner, Admin or Manager approves it. Approving sends nothing to Meta.
- Open the template page, or the version in the editor, and select Approve.
- Lift checks the template on your products. Read any warning, such as text that shrinks or may be hard to read on a few photos, then select Approve anyway or go back and fix it. A badge or price that reaches outside the middle band of the square shows as a warning ("1 thing is worth a look. It does not stop a save."): single-image ads would trim it, so move the layers inside the band (see Limits below), then approve.
- The version shows who approved it and when.
A new version starts as a Draft again. The approved version stays on the catalog until you put a newer one there.
Put it on a catalog
A line on a catalog says which products wear the frame and on which days. Lift checks every hour, draws the frames for the products that match, and takes them off a product that stops matching or when the days end. A frame is drawn with the price Meta holds for the product, and a daily check takes off a frame whose price no longer matches (see Check and take frames off).
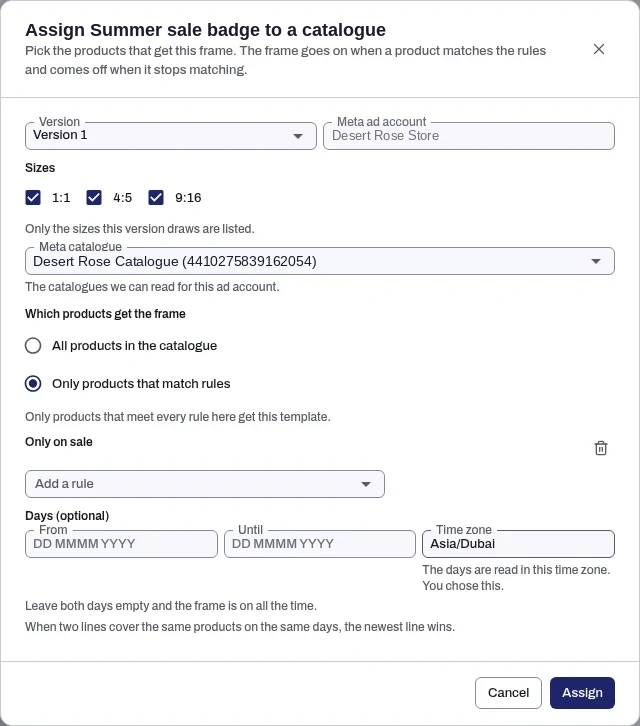
- On the template, select Put on a catalog.
- Pick the approved Version and the Meta ad account, and keep 1:1 ticked under Sizes: a line without it writes nothing.
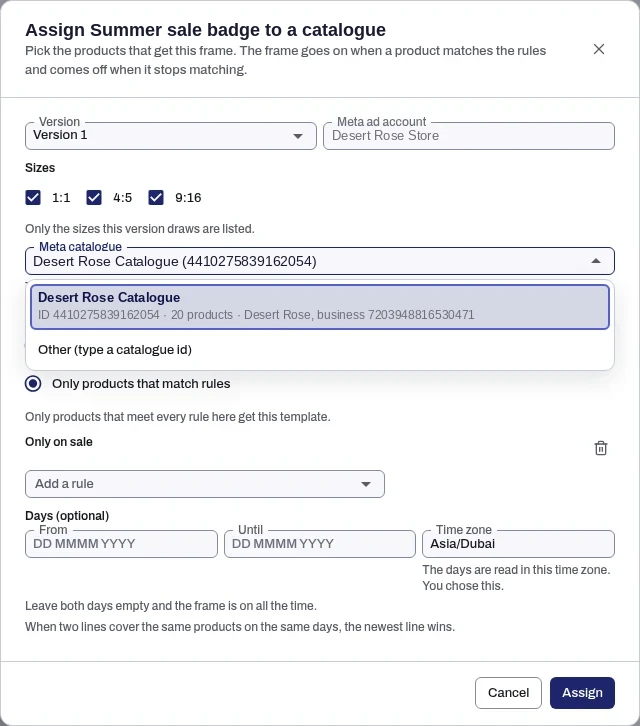
- Pick the Meta catalog from the list, or choose Other and type its number.
- Under Which products get the frame, add rules (on sale, a price, in stock, a product set) or leave none for every product.
- Under Days, set From, Until and the Time zone, or leave them empty to keep the frame on. A sale moment fills in its own days.
- Select Assign. The line shows under On catalogs, in Frames on your catalogs.
The newest line wins
When two lines cover the same product on the same days, the line you saved last shows. A sale line covers a product only while it is on sale and in stock; otherwise the product falls to the next line or its original photo. The Assign window warns you before you save an overlap.
Put frames on now
To skip the hourly wait, use the buttons in the first row of the catalog under On catalogs:
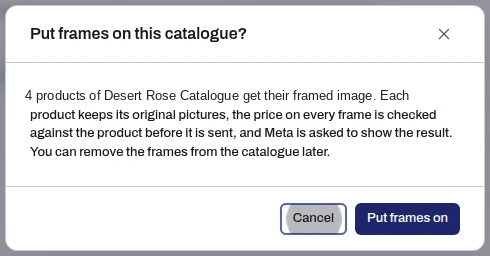
- Select Put frames on now. The window Put frames on this catalog? says how many products get a frame and which catalog they go to. Each price is checked against the product before it is sent.
- Select Put frames on to confirm.
- A message above the table says how many products now have their frames. Any product that is waiting for Meta, was refused or was skipped is listed with its reason.
Meta fetches new pictures in its own time, so a product can read Waiting for Meta to show it for a while.
Only the square 1:1 frame goes to Meta, one framed picture for each product. Carousel and collection ads show the square whole; in single-image ads the badge and the price stay inside the middle band:
Use it in ads
An ad shows the frames when its creative asks for the framed pictures. You switch one ad at a time, with an approval.
- Under In ads > Framed ads, select Choose an ad and pick it by campaign, ad set or name.
- Select Propose switch. The card shows what would change on the live ad.
- Select Approve, then confirm Put frames on this ad?.
- The card shows the ad Before and After, its status, and who proposed and approved it.

The ad's earlier creative is kept, so you can go back at any time.
Check and take frames off
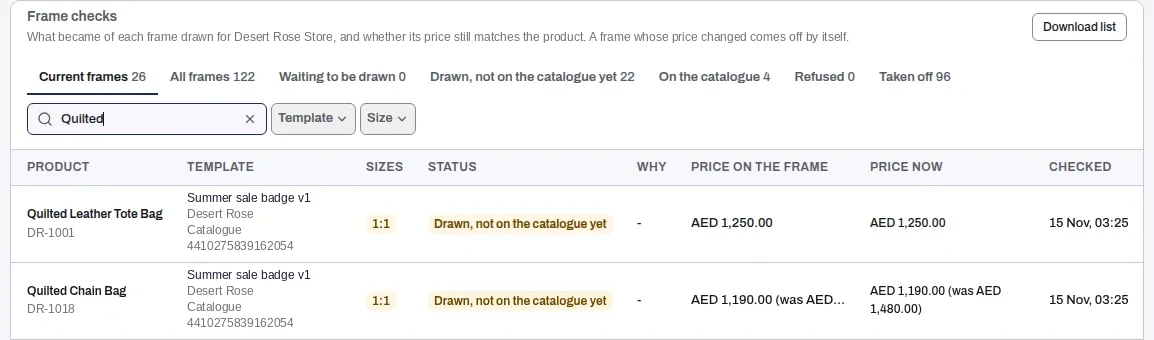
Frame checks, under Checks, lists every frame Lift has drawn, with its status and, when there is one, why. The Price column shows the price drawn on the frame, with a tick while the product still has that price. When the price has changed, it shows in red with the price now beneath it; the daily check takes off a frame whose price no longer matches. Use the tabs to show one kind of frame, and Download list for a file.
To go back:
- Undo: puts every product the last Put frames on now changed back to the pictures it had before. It is ready once you have put frames on from this page, and it stays ready while you move between the Frames views; after you reload the page, use Take frames off the catalog. Confirm Undo the last Put frames on?.
- Take frames off the catalog: takes our frames off the catalog and leaves everything else on the products. Confirm Take frames off this catalog?.
- Remove frames on an ad: confirm Remove frames from this ad?. The ad goes back to its old creative and keeps running, and the frame pictures come off its catalog items; any picture you changed since stays as you changed it. If an item still has its frame, the card lists it, and Remove frames again retries.
- Remove on a line: its frames come off at the next hourly pass.
While a line is on, its frames come back every hour, so remove the line to keep them off.
Retire templates
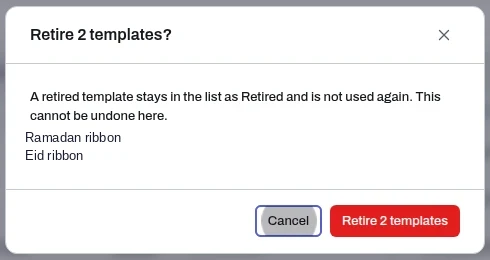
Tick templates in Templates and select Retire, or use the archive icon on one row. A retired template stays in the list and is not used again. Retiring cannot be undone here. Remove a template from its catalogs before you retire it.
See which template sells better
The Which template sells better card, under Results, splits your store's orders by the frame each product wore each day, and by the days it wore none, over a window of the last 7, 14, 28, 60 or 90 days. It shows orders per template, then each template against unframed and against each other. It is a comparison, not a random test, and it counts orders from your connected store, so there is nothing to compare until your store has orders in the window.
Compare your ads head to head
Head to head, a tab of Lift > Products, puts a test set of ads beside your current catalog ads on Meta, and your own store orders show which sells more. The test ads are a second set of ad sets that show your product sets with the new frames; your current ads are not edited.
Before a test can start
Before a test can start lists what the test needs, each step with who does it and its state (Done, Waiting or Needed). The test card appears when all are done:
- Meta business access: the owner of the ad account connects Meta with business access.
- The 10-product catalog check: nothing to press. It reads a sample of your products each time the page opens and changes nothing.
- The matching product sets: an Owner, Admin or Manager approves the matching product sets for the live ad sets, and Lift makes them in the catalog. A window lists the sets first, then you confirm.
- Changes to this ad account: the account allows Tapper to make changes in it.
- The end date: the test ends by the date the step names.
A test needs at least one active ad set that shows one of your product sets. Only one test runs per ad account. Under What happens next, the page lists the order: the catalog check reads a sample of your products each time the page opens and changes nothing, Create product sets lists the sets first and then you confirm, and Approve and start the test appears with its added spend and its Undo.
Start, read and undo
Approve and start the test shows first what it adds: the test ads' budget follows your current ads, so the card gives the added spend a day and in total to the end date, per market. Meta splits the audience evenly between the current and the test ads. The first days, while the new ad sets learn, are left out of the comparison, and the card says from which day the test is read.
The test reads Starting..., Scheduled for its start day, Running with the days left, then Ended; Could not start says it did not begin, and Undone that it was undone. Undo the test puts your current ads back as they were before the test, on their full audience; the test ads are paused and kept, and your catalog is not touched. Approving and undoing take an Owner, Admin or Manager.
Agencies
In your agency's app, Frames sits under Organization: a library of templates you make once and copy into any client.
- Select New template, name it and pick a starting point.
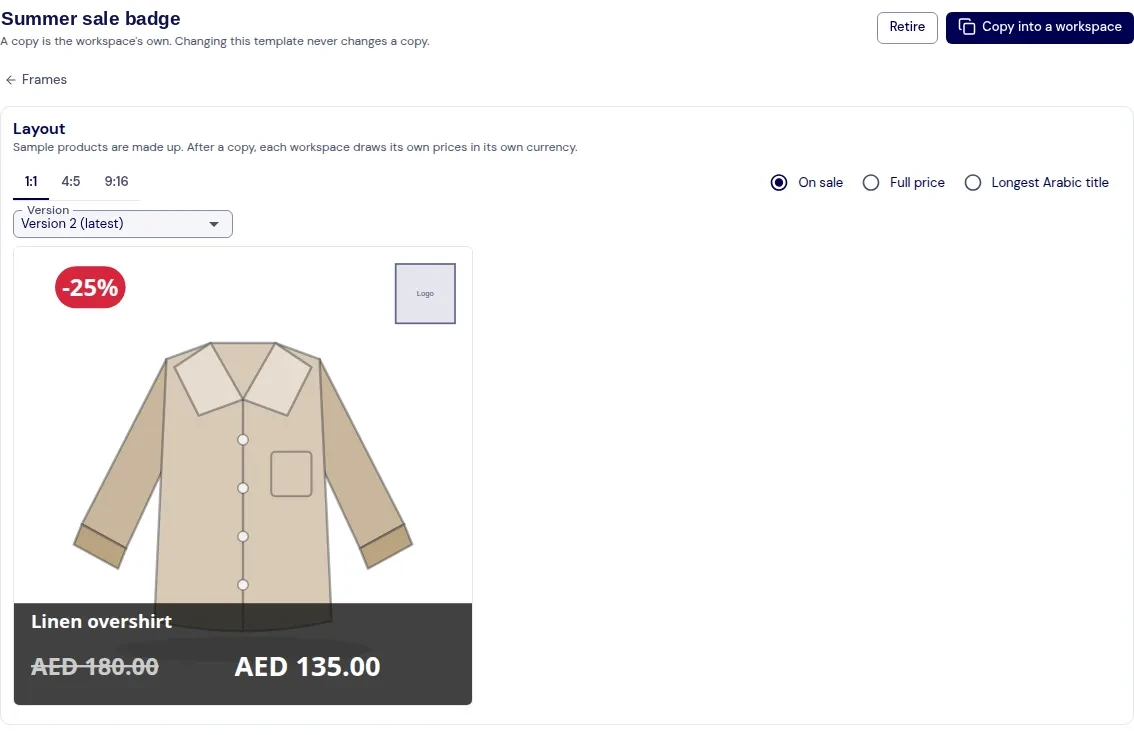
- Check the Layout on On sale, Full price and Longest Arabic title.
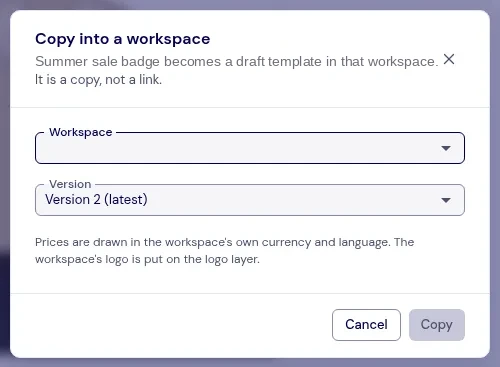
- Select Copy into a workspace, choose the Workspace and Version, and select Copy. The copy is the client's own draft. It draws the client's own prices in their own currency and puts their logo on the logo layer.
- In the client's workspace, open Products and then Frames in your app's product section (your agency's own name for it, such as Pulse in the screenshot below), edit the draft, have it approved there and assign it as above.

The Copies table on the template page lists each workspace with its version, status and To fix. Retire takes a template out of the library; existing copies stay, and Unretire brings it back.
Limits
- Small photos: a small product photo still gets its frame, scaled up, and may look soft. A tiny one gets none.
- Single-image ads: single-image catalog ads crop the square to a wide strip (1.91:1), so keep the badge and the price in the middle band of the square; the editor warns when they are outside and does not stop a save. Carousel and collection ads show the whole square.
Related
Was this helpful?
Related articles
Still need help?
Chat with our team and mention this article.