

How to connect Meta Ads when you sign up
1. Sign up for Tapper
Create your account on the Tapper registration page with your name, email and password, or with Google. See Create your Tapper account.
2. Name your workspace
In the setup wizard, Name your workspace sets the workspace name, time zone and industry. See Name your workspace, pick its time zone, industry and domains.
3. Connect Meta Ads
- On Connect an ad account, click Continue with Facebook on the Meta Ads row.
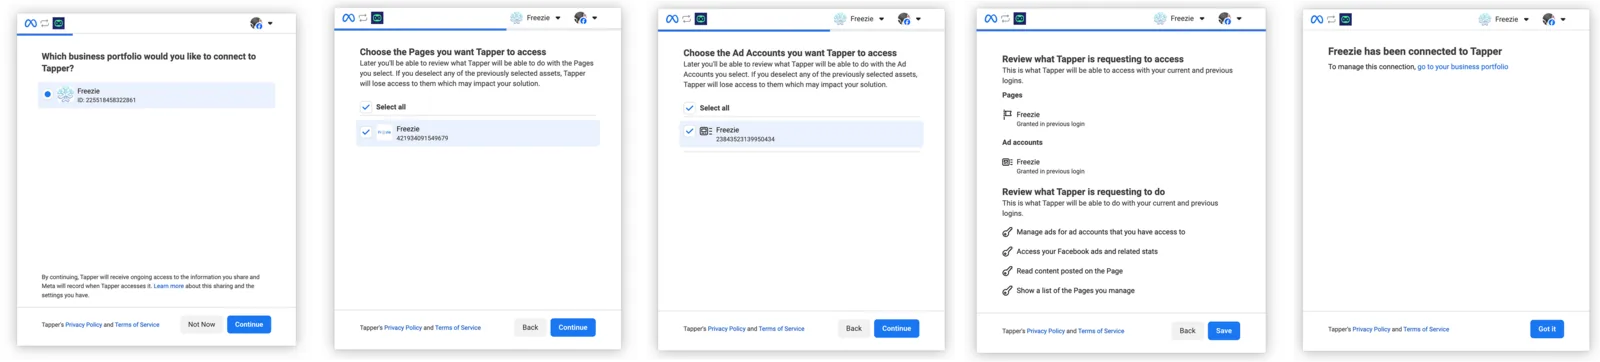
- Follow Meta's screens in the popup: select your business portfolio, choose the Pages and the ad accounts to give Tapper access to, review the permissions and click Save. When Meta says your business has been connected to Tapper, click Got it.
- In Tapper, tick the Meta Ads accounts to protect, click Accept the terms on Meta for each one to accept Meta's Custom Audience terms, then click Continue.
- On the Meta Ads page of Setup > Ad accounts, Ad sets tab, switch Protection on per ad set, or click Protect all. Tapper then starts detecting and filtering invalid traffic.
Each ad account needs a Meta pixel. See Before you connect Meta: permissions, the pixel and the Custom Audience terms and Connect Meta Ads.
Was this helpful?
Related articles
Still need help?
Chat with our team and mention this article.